Now I had my plan it was time to cut. There were only four pattern pieces that I made – but I found cutting this was quite a big job. It took a whole long night until well past a reasonable time to be in bed.

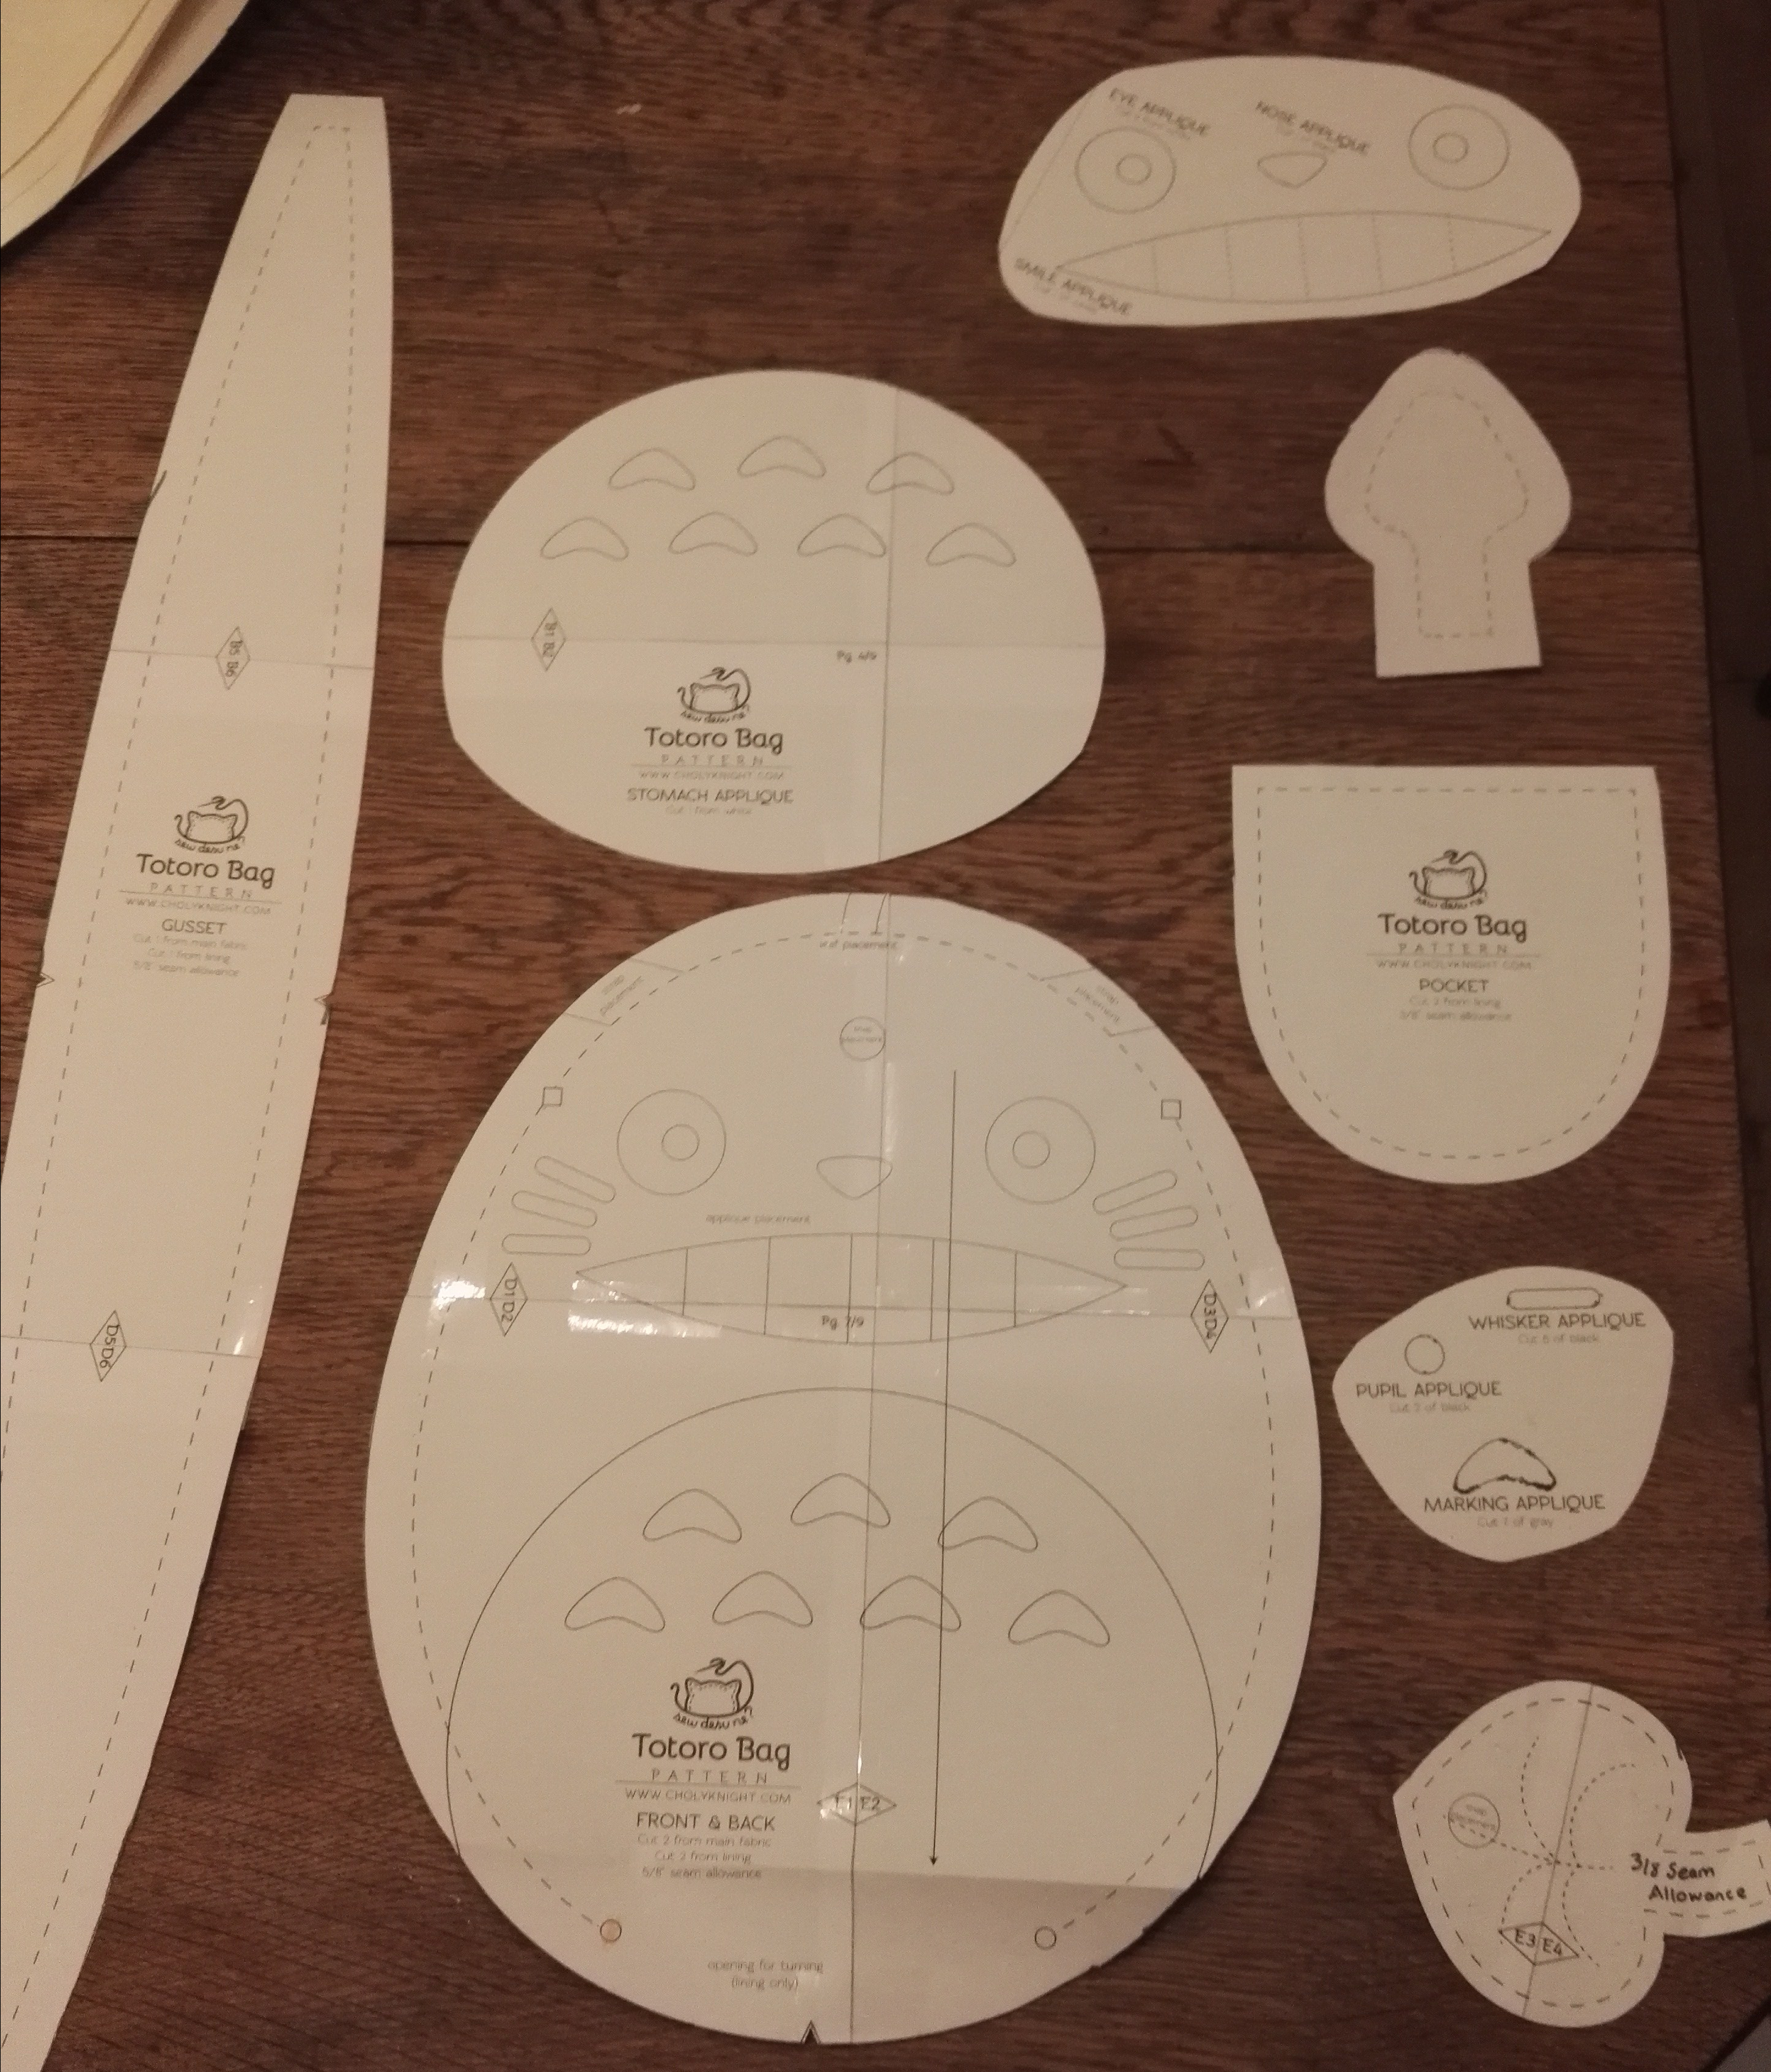
The pattern consisted of: a skirt piece (which was cut in three slight variants in lining and denim: sections with pockets, the standard symmetrical pieces and a centre back piece in two halves), a yoke (whole for the front and two halves for the back in lining and denim), and a main pocket and lining pocket lining section. Because I am quite a wide sort of person and I wanted quite a flared sort of a skirt – my skirt piece got too wide to fit on my roll of paper and I had to use a cut on the fold side to make it work.
One thing I like to do is write myself instructions on the pattern pieces so I can see what I did for next time. Here were my pattern pieces in a bit more detail:
Assembly took four rather long nights (it was my first big project since I was 15 and I really wanted to finish it before we went away to visit family).
I made the pockets – following Michelle Patterns instructions here.
- First I sewed the lining to the main skirt piece right sides together. It was the only curve I bothered to draw onto the fabric as I realised my skirt would probably look a bit silly if they weren’t symmetrical. As I am sure you are gathering from my extensive use of toddler drawing supplies I don’t really own much kit – and I definitely don’t have a curved ruler. So I used the edge of a small plate for the right width of my hand over the corner and drew the line on (I think I picked purple crayola for this line!).
- I pinned the pieces and sewed along my drawn line. Then, I cut the edges short, clipped the curve and turned it over. I then did two lines of over-stitching to keep the pocket sturdy each a presser foot width apart.
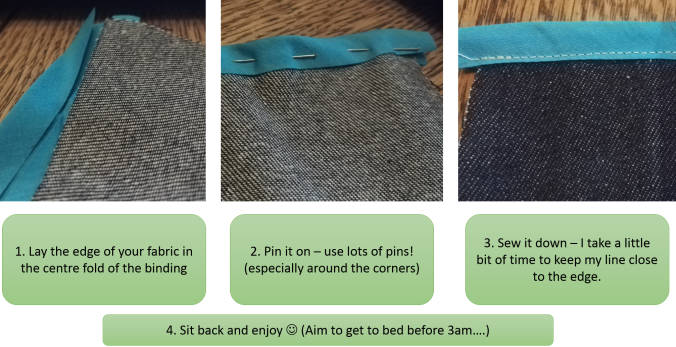
- Next I attached the back part of the pocket along the curved bottom edge of the pocket. I pinned and sewed into place. At the time I didn’t think to worry about this edge. But then I remembered that I put really heavy things into my pockets and so I went for a bit of high speed bias binding.
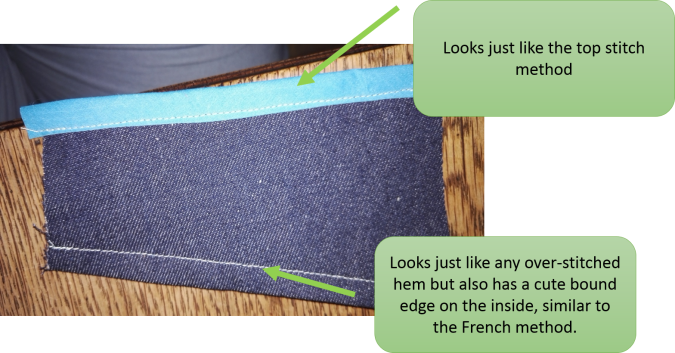
- When you flip it all out the right way you have a complete skirt section – that looks really cute. And a really big pocket that holds my big-ish smart phone comfortably.
Skirt Assembly
- I attached all my pieces using Flat Felled Seams until I had a complete skirt with just the centre back seam seam left to complete. (Here is how I sewed my flat felled seams)
- I sewed together my denim three yoke pieces
- I spent a long while working out how I was going to attach the lining and the skirt – and this was the method I came up with:
- I sewed together my lining skirt panels with a simple straight stitch and a row of zig-zag. Next time I think I’d pocket seam them – pocket seams are so quick and the knowledge of that raw edge picks at my brain (um…also… I put one piece on backwards which you can see in the picture down at the bottom – so after all my efforts I have a raw edge!). Plus – I used up ALL of my thread doing the zig zag stitch and couldn’t finish my next step until I persuaded my lovely toddler that she wanted another expedition to the fabric shop.
- I sewed together my three lining yoke pieces
So now I had a denim yoke and skirt and a lining yoke and skirt and I just needed a way to attach them that my poor sewing machine would be able to manage – the flat felled seams are three layers of denim thick so quite a challenge!
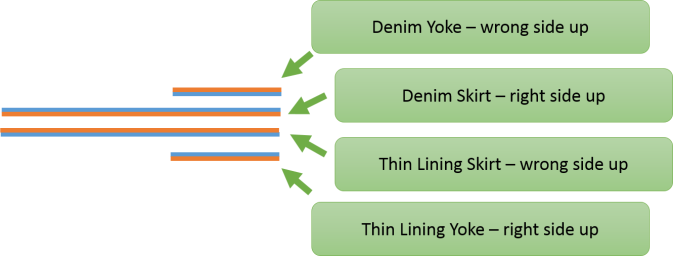
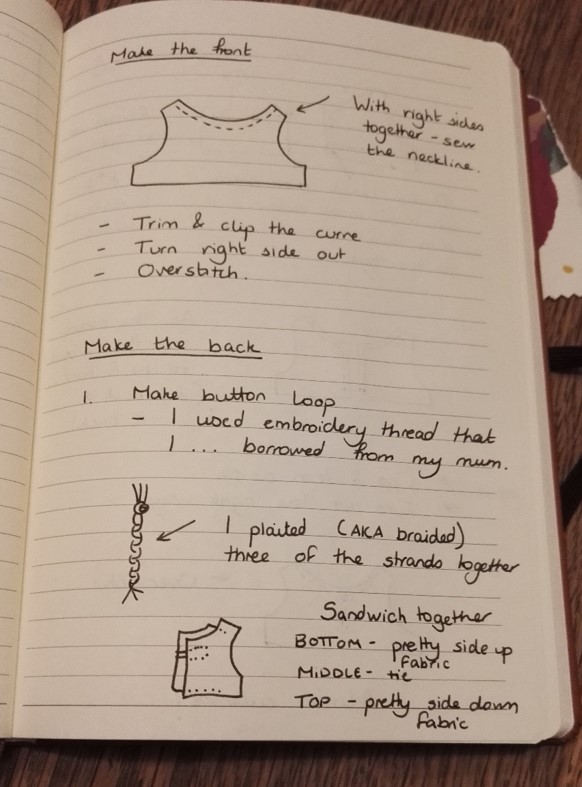
In the end I realised that compared to a single layer of denim my two layers of lining were really not an issue. So as I showed above I made an enormous fabric sandwich – the lining pieces and the denim pieces in their pairs right sides together (blue sides in the picture) and then the lining pair wrong side to the wrong side of the denim pair (orange sides)
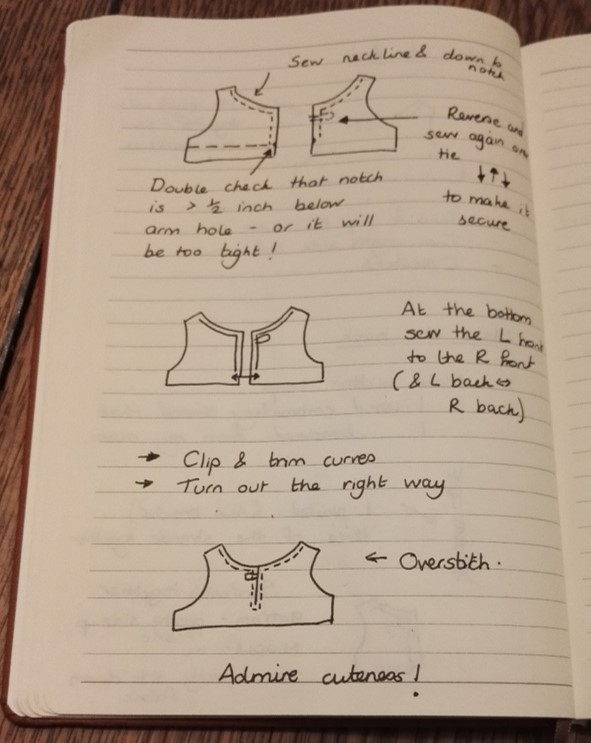
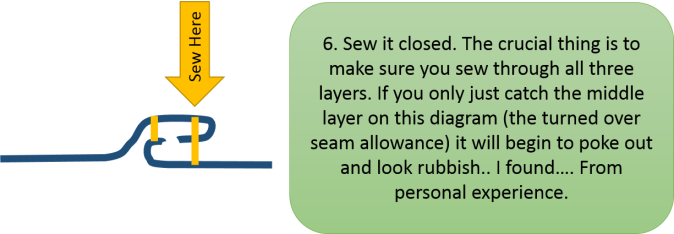
Then I folded the denim bits the correct way and pulled the lining fabric out of the way and over-stitched to bottom of my yoke as shown below
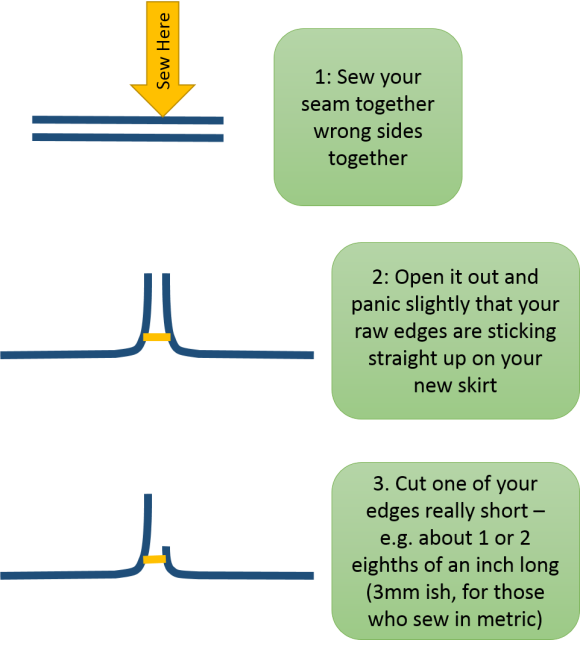
Then I folded everything around the correct way – the lining and the denim sitting nestled together. I folded over the ends of the ends, pinned lots and sewed it together (as you can see in the second, highly technical [cough!], diagram)
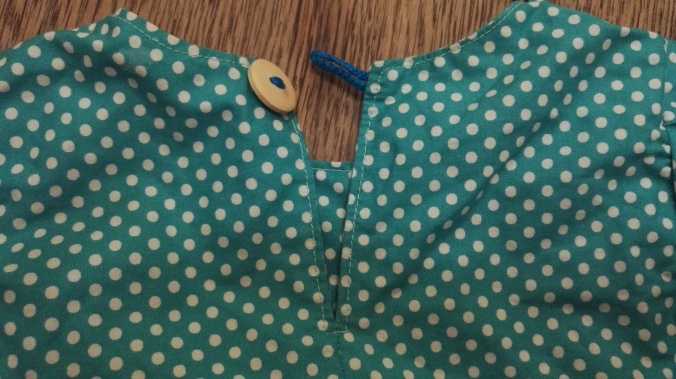
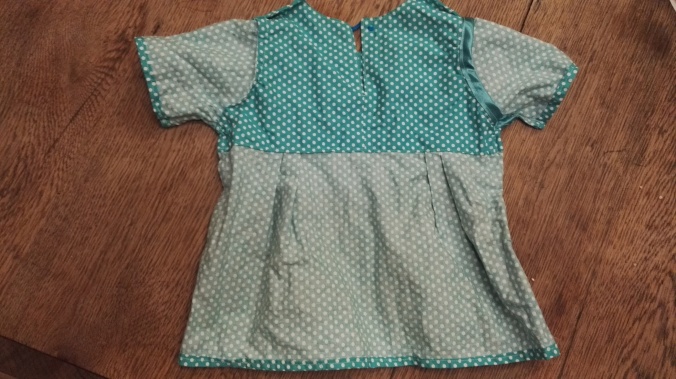
This is how it looked from the outside and the inside – I like it. It is neat and tidy and didn’t take an age.

dav

dav
So now I had this enormous flat cape like skirt all finished at the top. And I only had one night before three weeks away and I REALLY wanted it finished. So I made a slightly unusual decision – I looked at a load of YouTube and blog tutorials of how to finish this sort of lined skirt and decided it all looked too tricky. So I hemmed and bound the bottom edge of the denim and double folded over and hemmed the lining skirt. Then I did a slightly mad thing…. I just bunged some bias binding over the two back centre edges as well. Then I sewed it together up to where the zip should be and put in a standard zip (the standard old fashioned sort of way – baste the seam closed. Pin the hell out of the zip and sew the tape on. Remove the basting – Ta Da! There is a zip).
I don’t think this was the best method. But I actually like the finished look. Here it is below from the inside (where you can see my unusual zip insertion and finishing method and the outside. It is looking a bit crumply as I have worn it about 30 of the last 40 days. It is really comfy and seems to be hard wearing so far.


And here I am, this morning… wearing my skirt (as I do so many days). Even though there were errors and imperfections, this project has made me so happy. I find it wearable, comfortable and exactly my style.